0
✕

Login

Lost your password?

LV Primary_White
✕
  • Home
  • Portfolio
  • About
    • Biography
      • History
    • Awards / Activities
    • Booking
  • Blog
  • Shop
    • Sewing Patterns
    • Crafting Tools
  • Home
  • Portfolio
  • About
    • Biography
      • History
    • Awards / Activities
    • Booking
  • Blog
  • Shop
    F-Sewing patterns

    Sewing Patterns

    tools menu-3

    Crafting Tools

    LV-Menu filler
LV Primary_White
✕

Login

Lost your password?

0
0
✕

Login

Lost your password?

LV Primary_White
✕
  • Home
  • Portfolio
  • About
    • Biography
      • History
    • Awards / Activities
    • Booking
  • Blog
  • Shop
    • Sewing Patterns
    • Crafting Tools
  • Home
  • Portfolio
  • About
    • Biography
      • History
    • Awards / Activities
    • Booking
  • Blog
  • Shop
    F-Sewing patterns

    Sewing Patterns

    tools menu-3

    Crafting Tools

    LV-Menu filler
Submark - LV
✕

Login

Lost your password?

0
0
✕

Login

Lost your password?

Submark - LV
✕
  • Home
  • Portfolio
  • About
    • Biography
      • History
    • Awards / Activities
    • Booking
  • Blog
  • Shop
needed materials

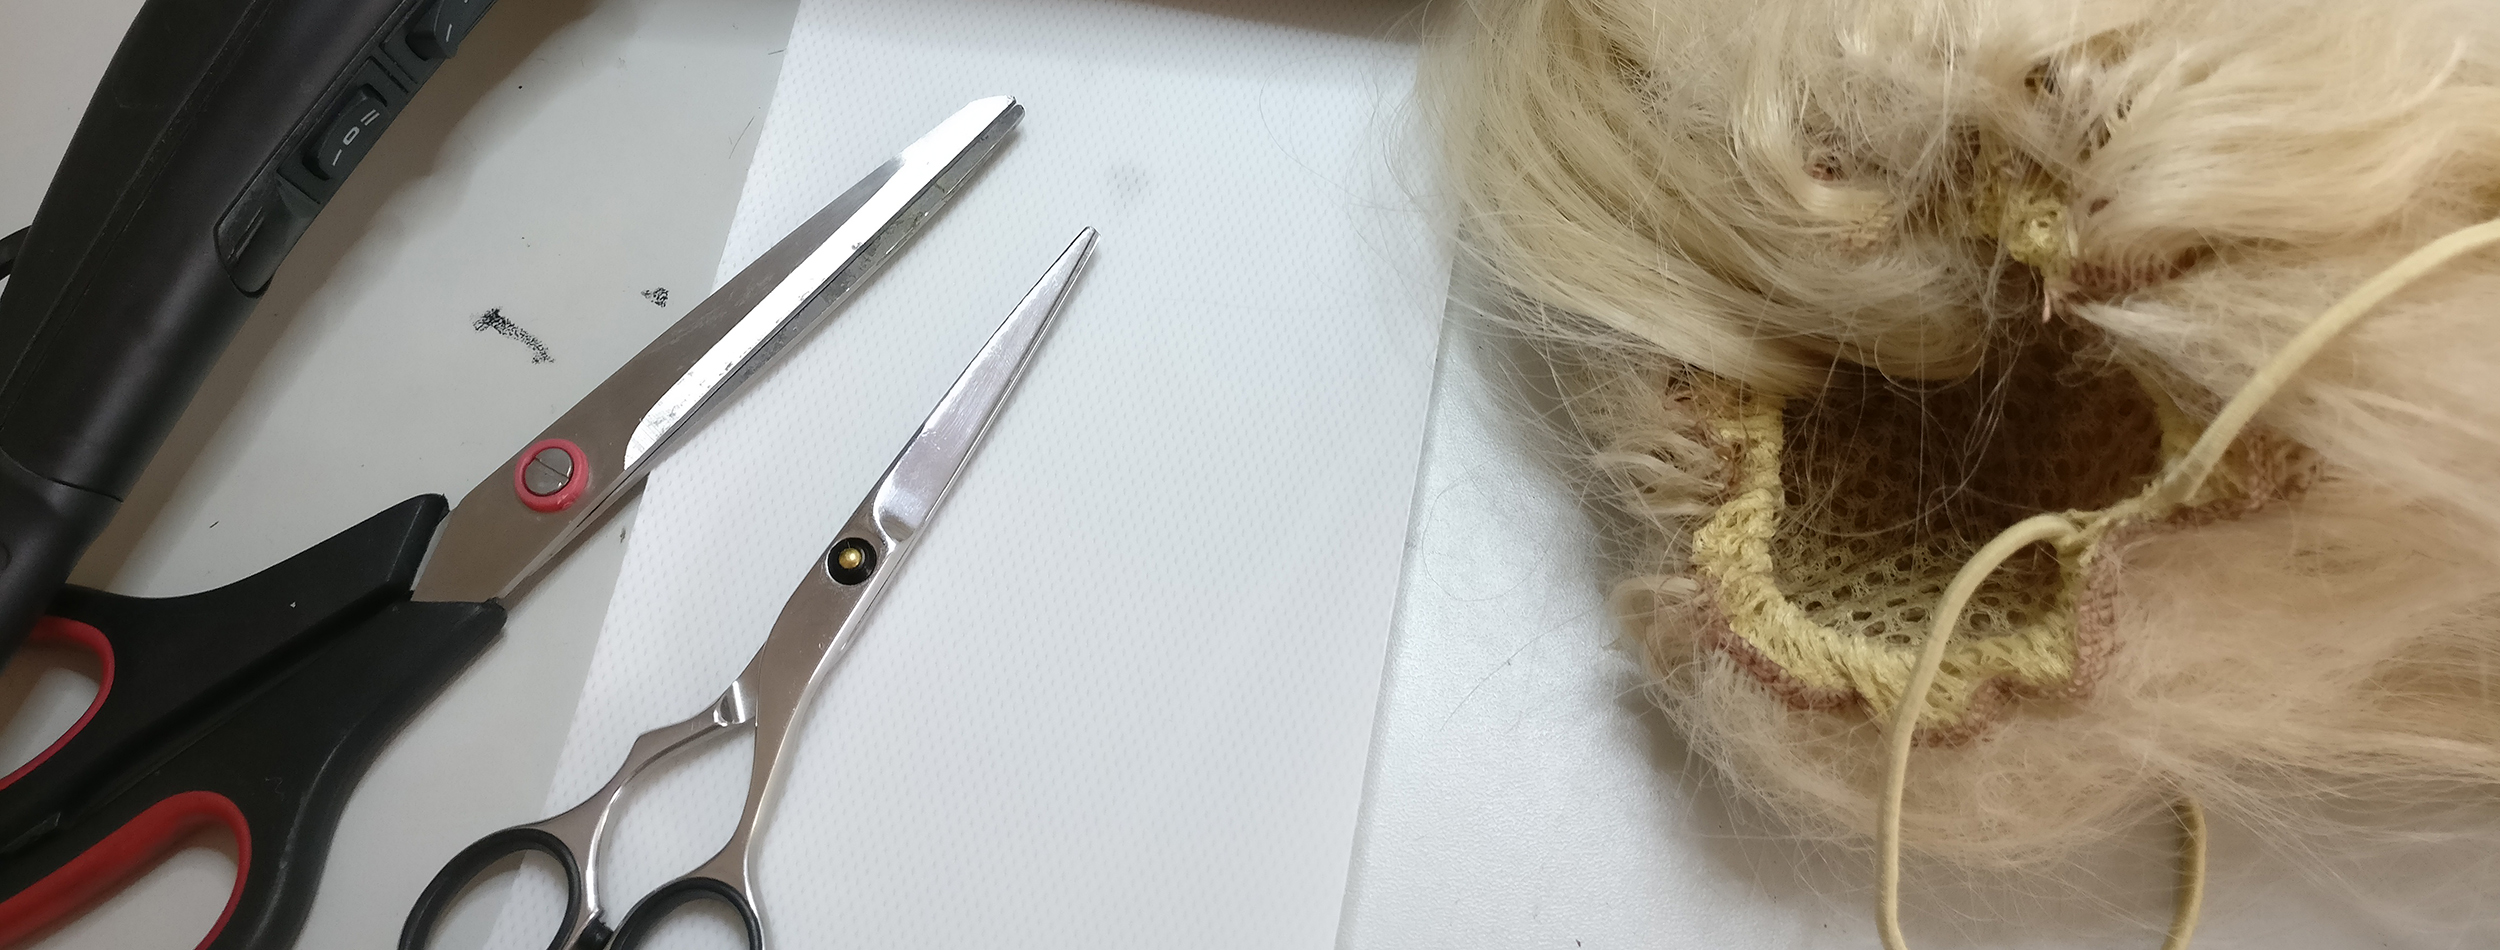
You will need the following materials:

Note: this is a method for a smaller and less heavy pony tail.

  •  Heatgun
  • Scissors
  • Wig scissors (I use a barber scissors for it, never cut something else with it!)
  • Worbla Crobra cast (because its light weight)
  • old pencil (or stick)
  • Clip in wig net (the wig I bought had a clip in pony tale ,I stripes the netting from the clip.)
  • Wig head
  • T-pins
  • Heat proof hands

Safety note:
You will be working with real hot material, make sure not o burn yourself with the heat gun or the worbla
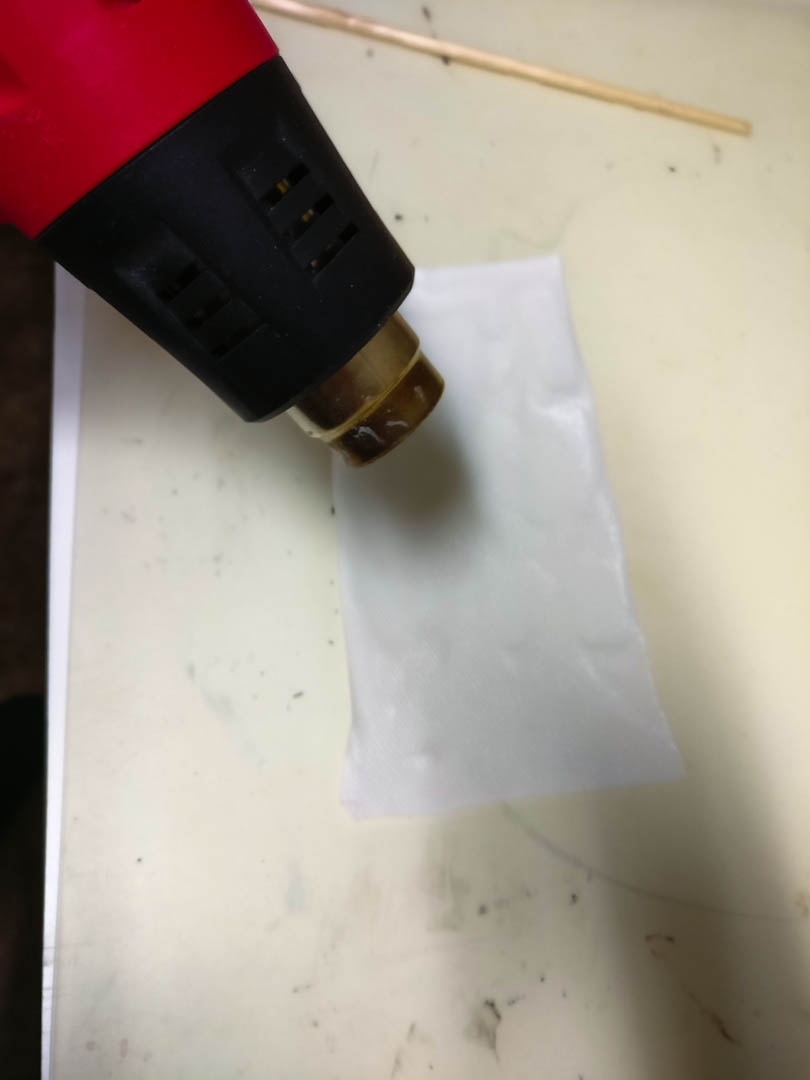
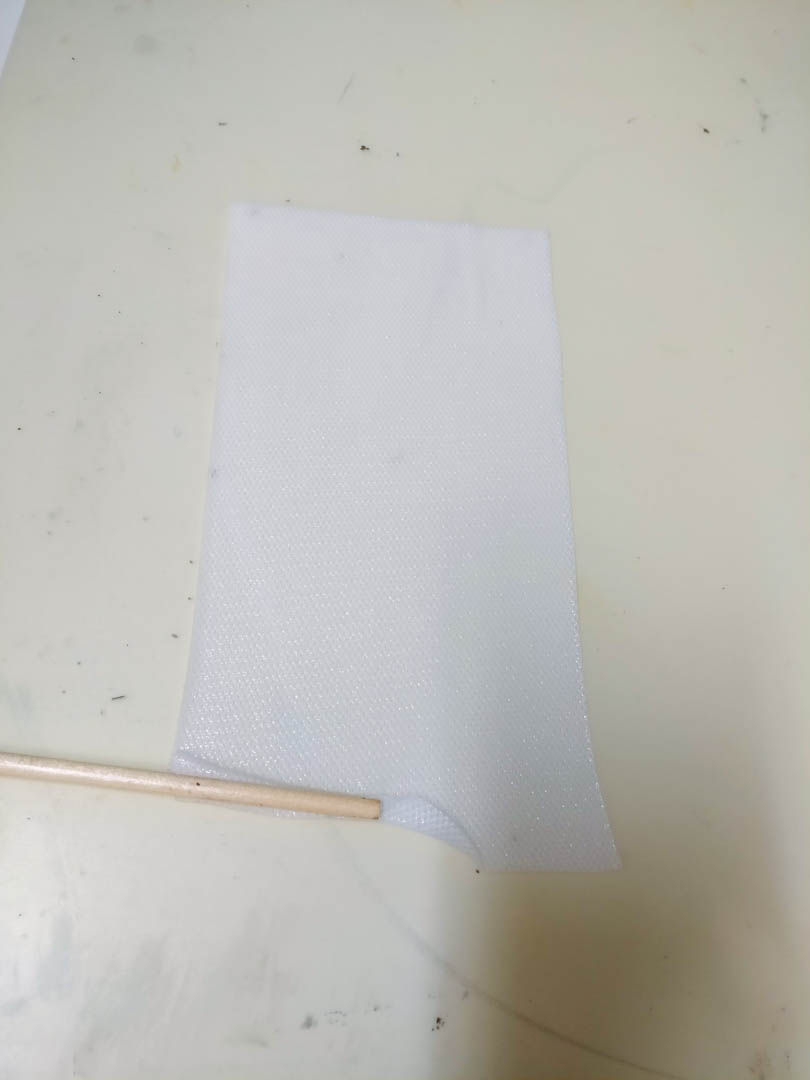
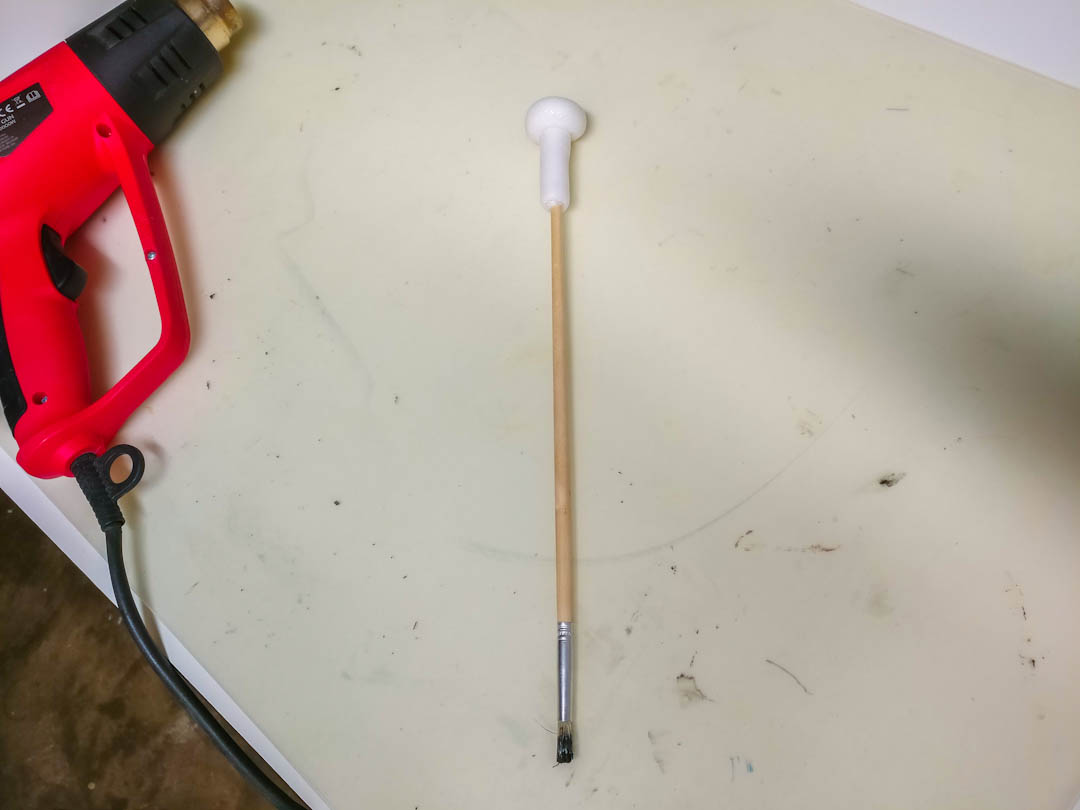
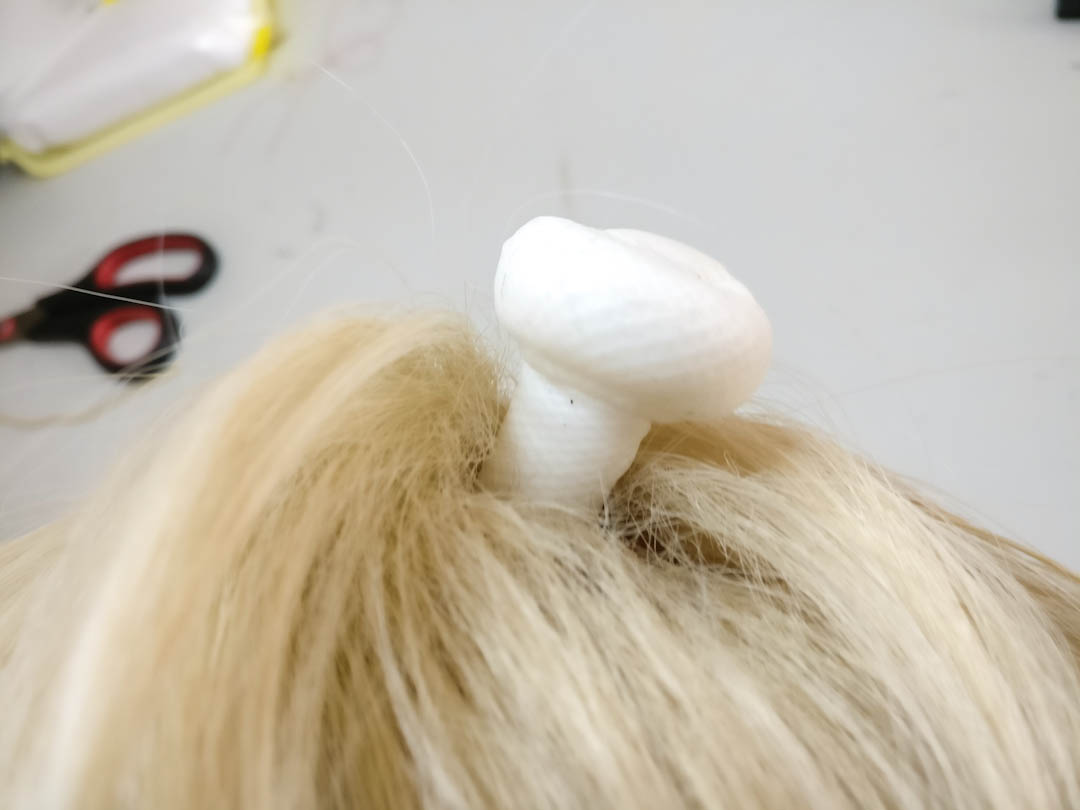
heat it up
roll the stick in halfway the mesh, and make a bump with the excess.
looking good

trust the progress
cut off the rest
tadaa

Step 1

Making the base

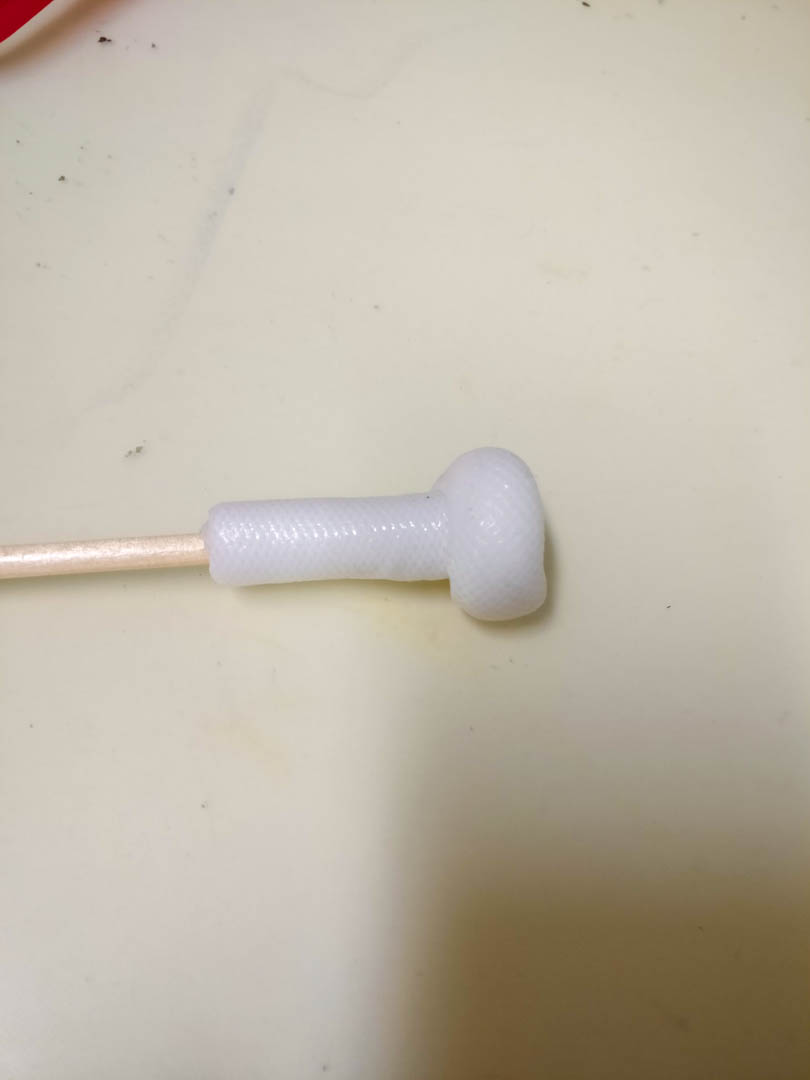
cut a stroke of worbla croba cast, this should have a height of 2x the wanted ponytail distance from the wig. the length is up to you, this will be the thickness of the ponytail (remember you can always ad more)

Heat up the worbla cobra cast with your heat gun, I like to do that around a 200°C.
Fold the length of the heated worbla cobra cast in half. press it carefully together and reheat it again, roll the worbla cobra cast around the end of an old paint brush.

While the worbla cobra cast is still worm press the top part (where there is no stick) into a flat ball.
I pressed the stick on the table to flatten the top and rounded the sides by rolling it over the table. You will have a funny looking paintbrush now.

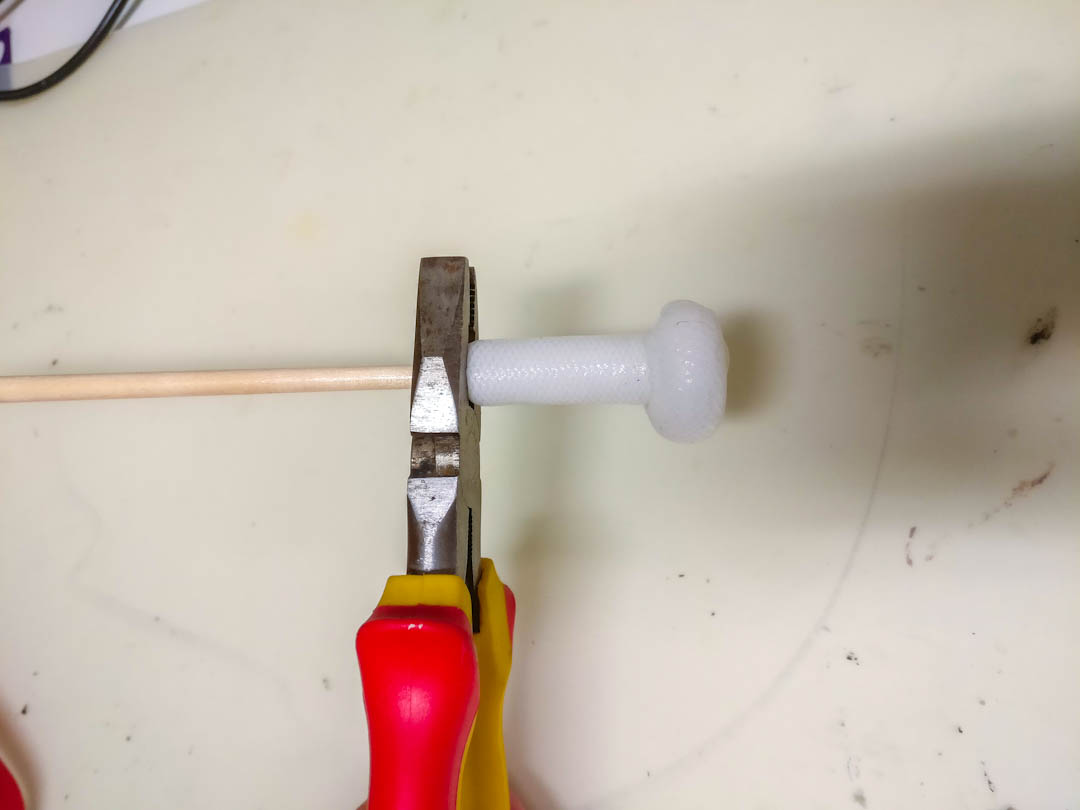
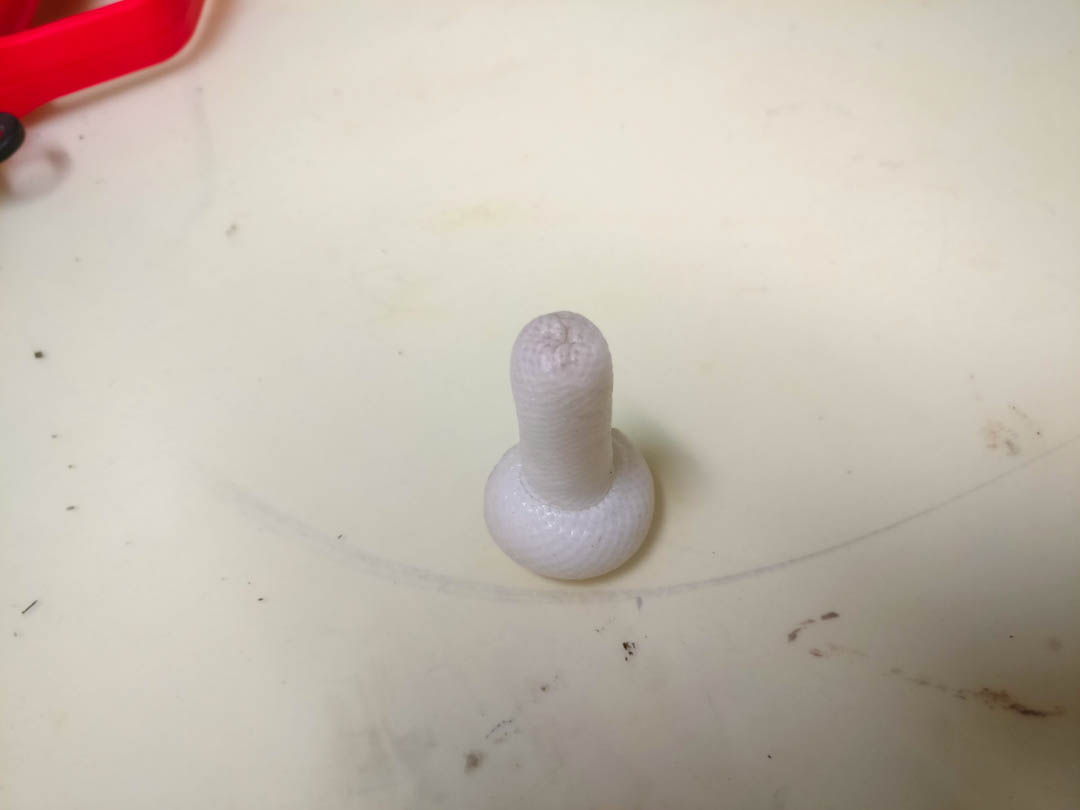
Cut of the excess of the stick (so it won't pinch in your head), and round the bottom by pressing the worbla cobra cast around it with your fingers. let everything cool down before continuing to the next step.

poke it through the wig net
top view
head till soft with a heat gun

2 layers thick for more strength
inside view
support the bump with pins

Step 2

Attaching the base to your wig

This will be the challenging part.
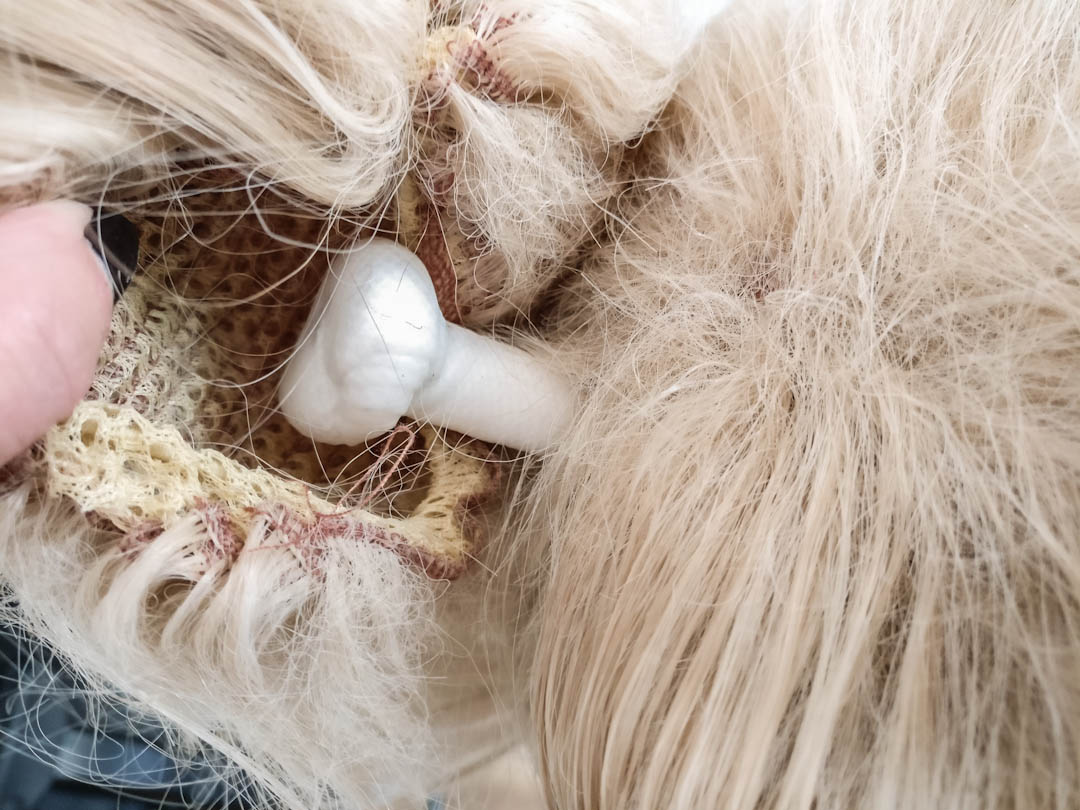
First test if your bump is wide enough to hold the wig net, do this by pulling the elastic.

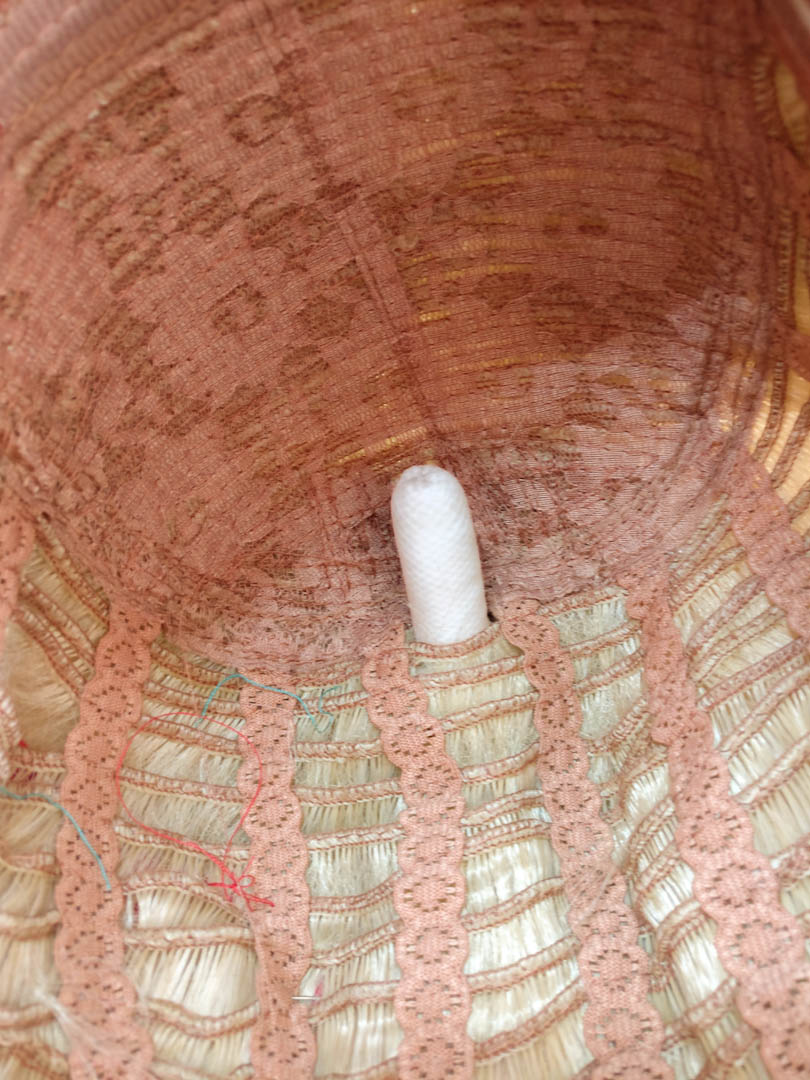
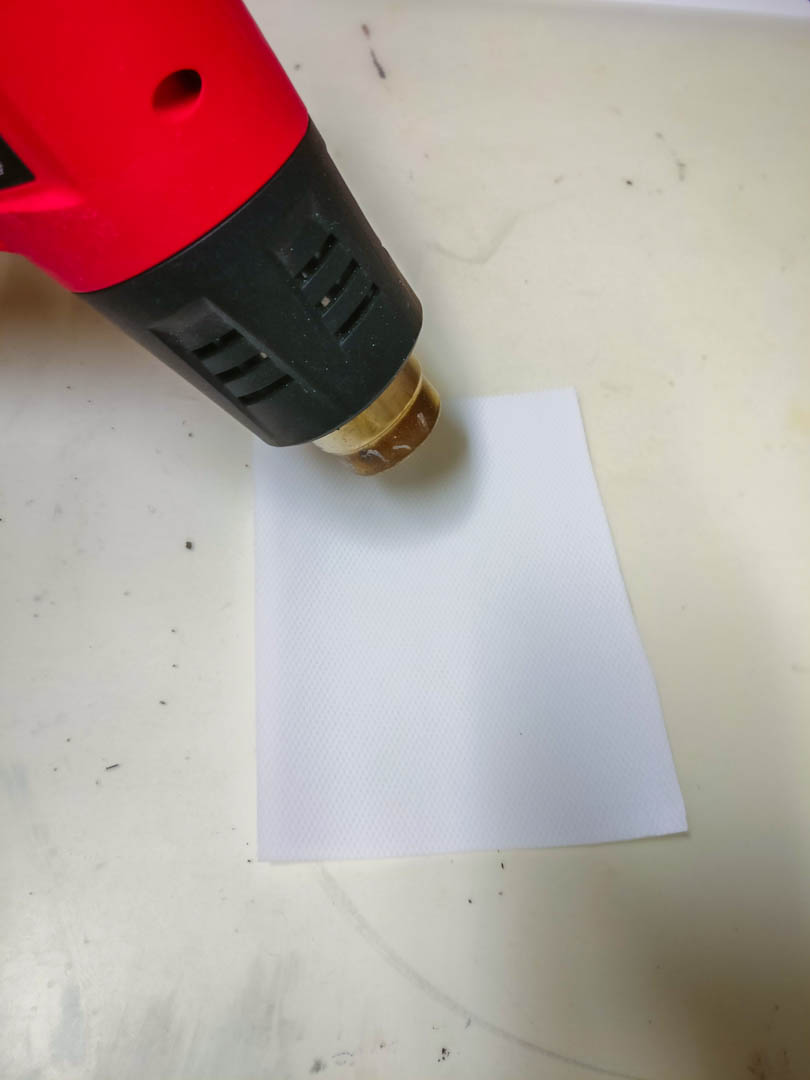
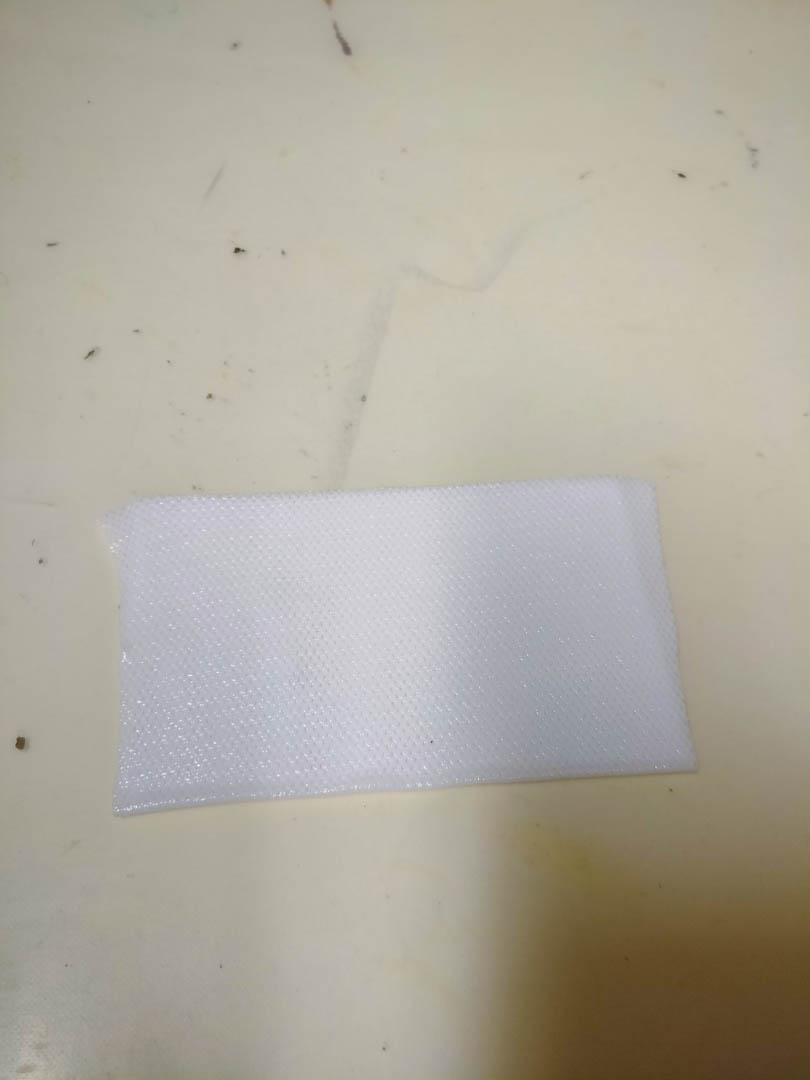
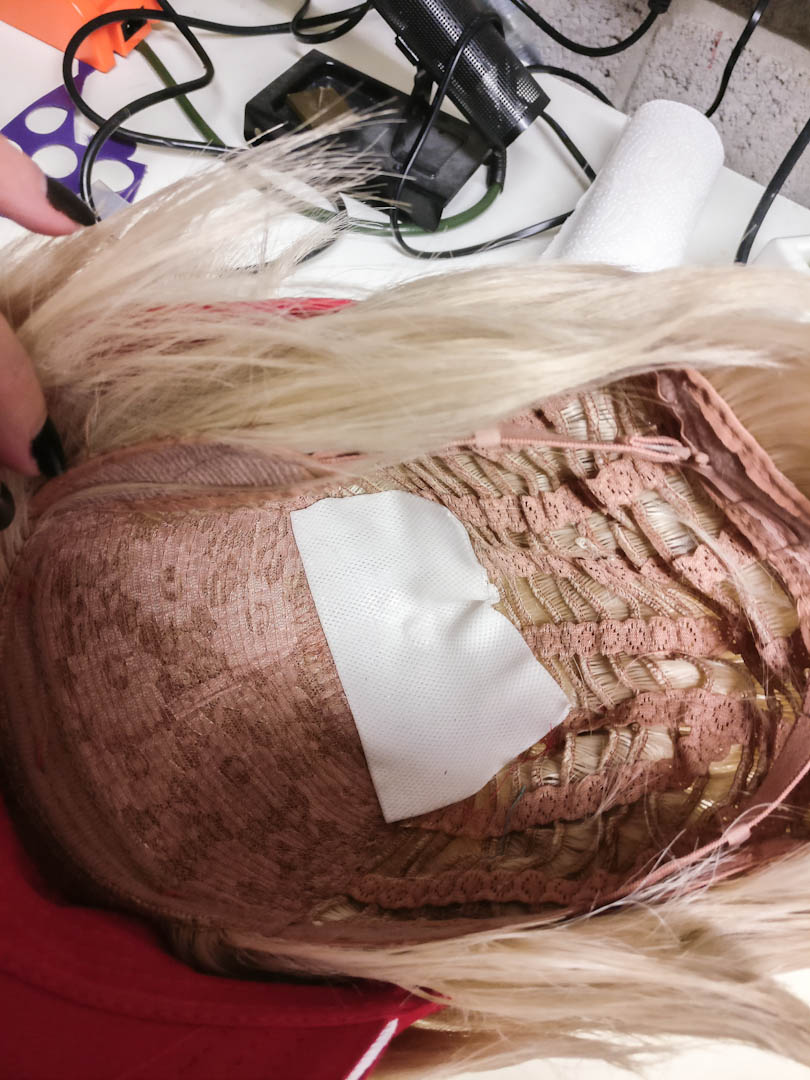
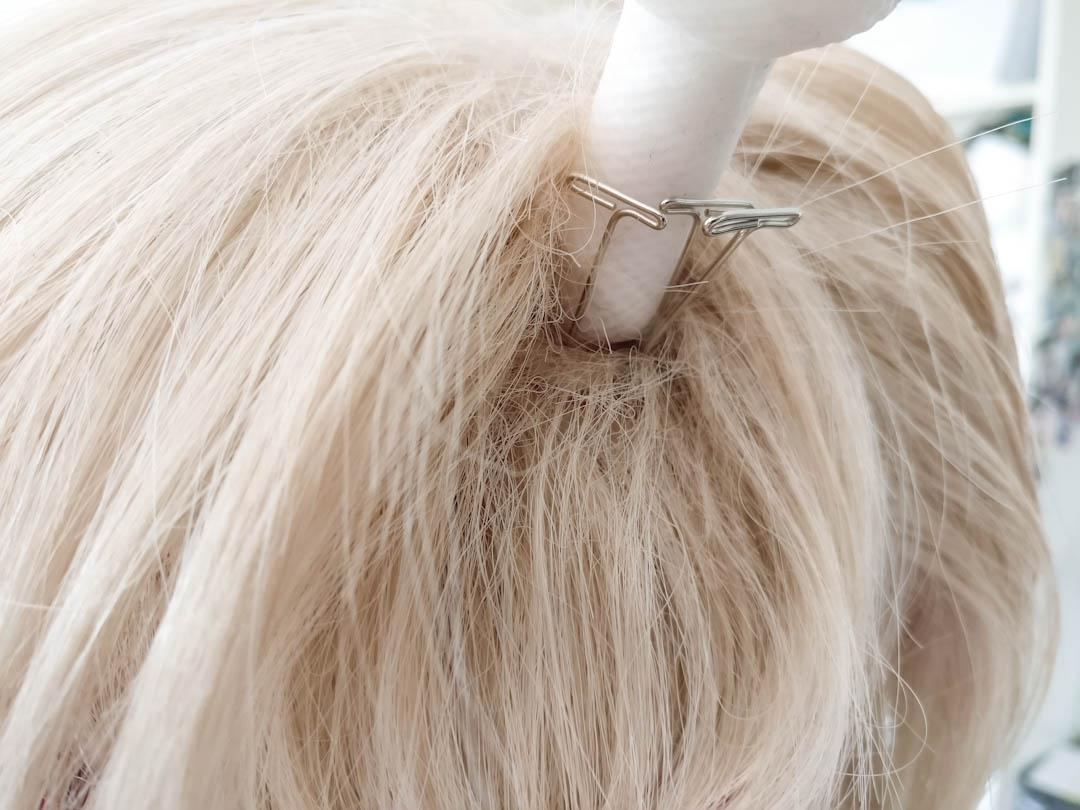
Decide where you want your pony tail to be, press the small side of your bump in the wig. Heat up a square of worbla cobra cast and carefully heat up the bottom of your bump, watch out you don't want to burn your wig in this step. When both part are worm press the bump in the middle of the worbla cobra cast square.
Now carefully place the wig on a wig head, this will make sure the worbla cobra cast is curved in the shape of your head. When on the wig head you can hold the bump in place with your hands or some pins, let everything cool down.

cover the bump with the ponytail cap
place a firm knot
cut off the excess elastic

Step 3

Attaching the ponytail

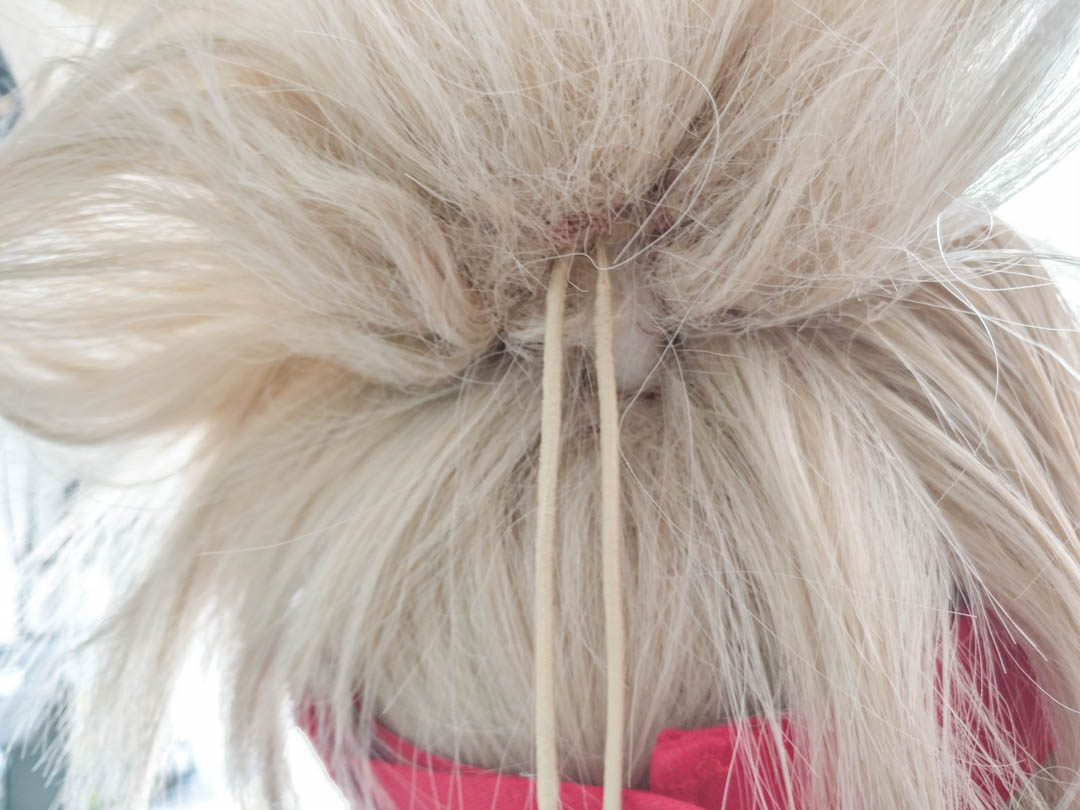
Check if the bump is standing correctly. if not you can always add another square of worbla cobra cast to secure it more.

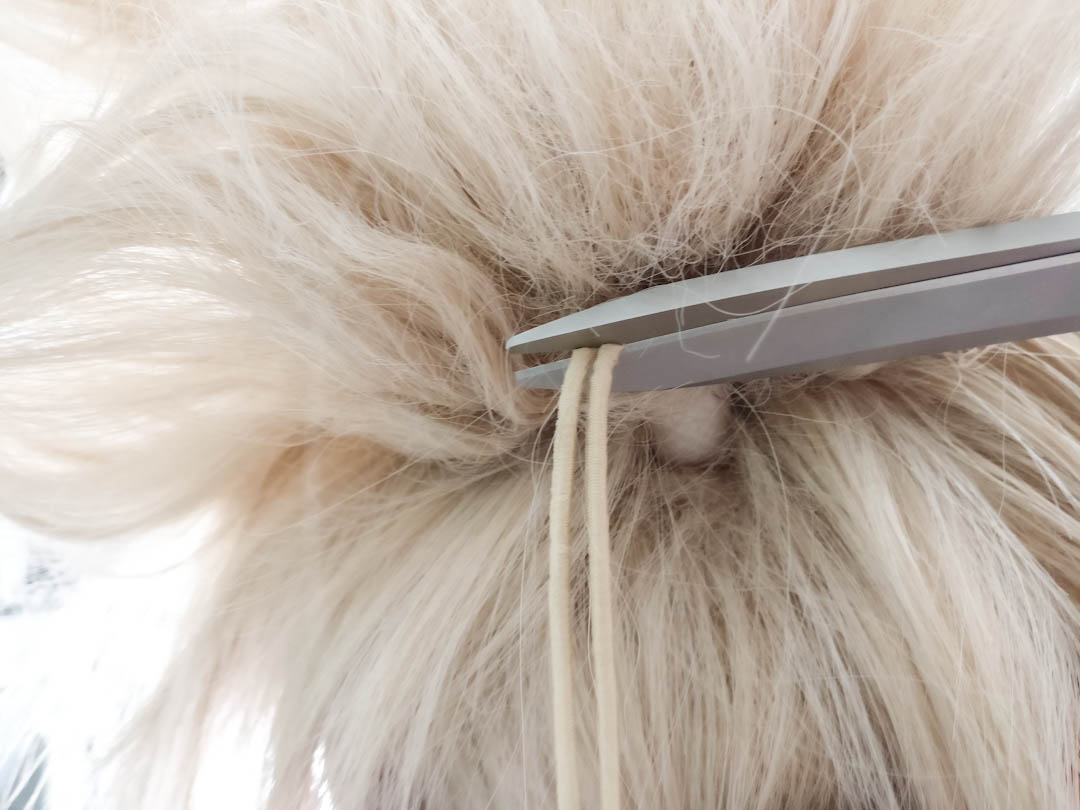
cover your bump with the wig net (that you can remove from the clip) and pull the elastic real tight. Ad a knot in the elastic and cut off the excess elastic.

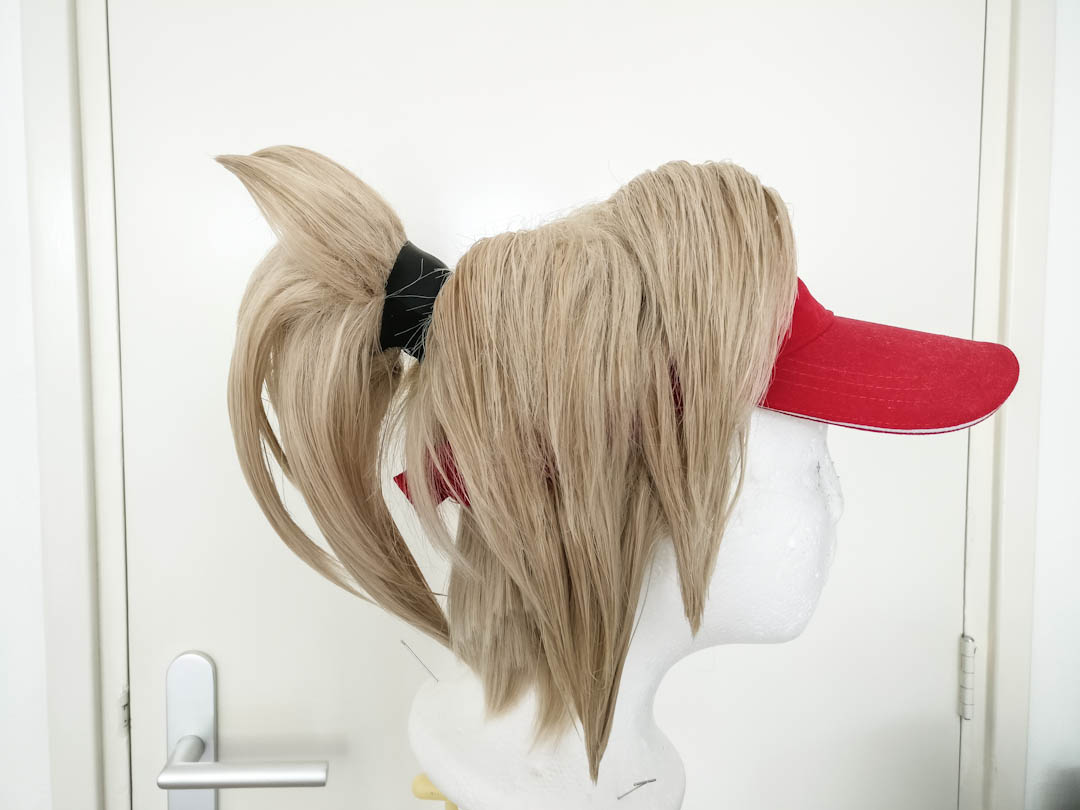
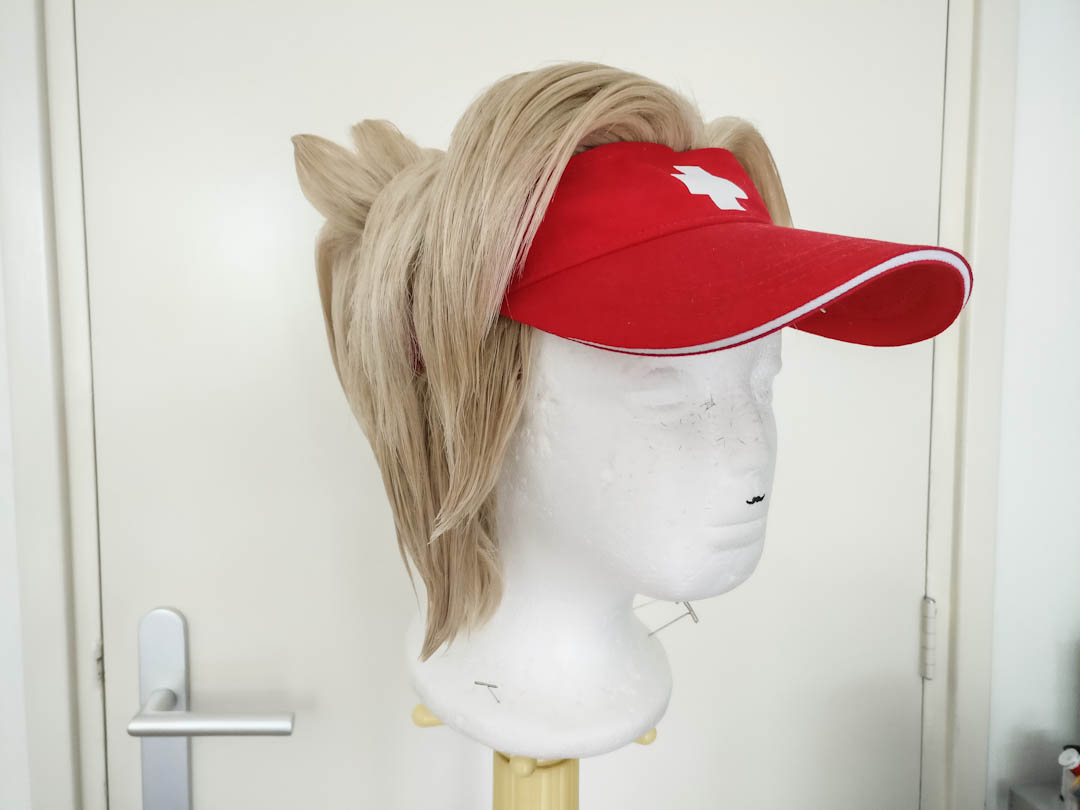
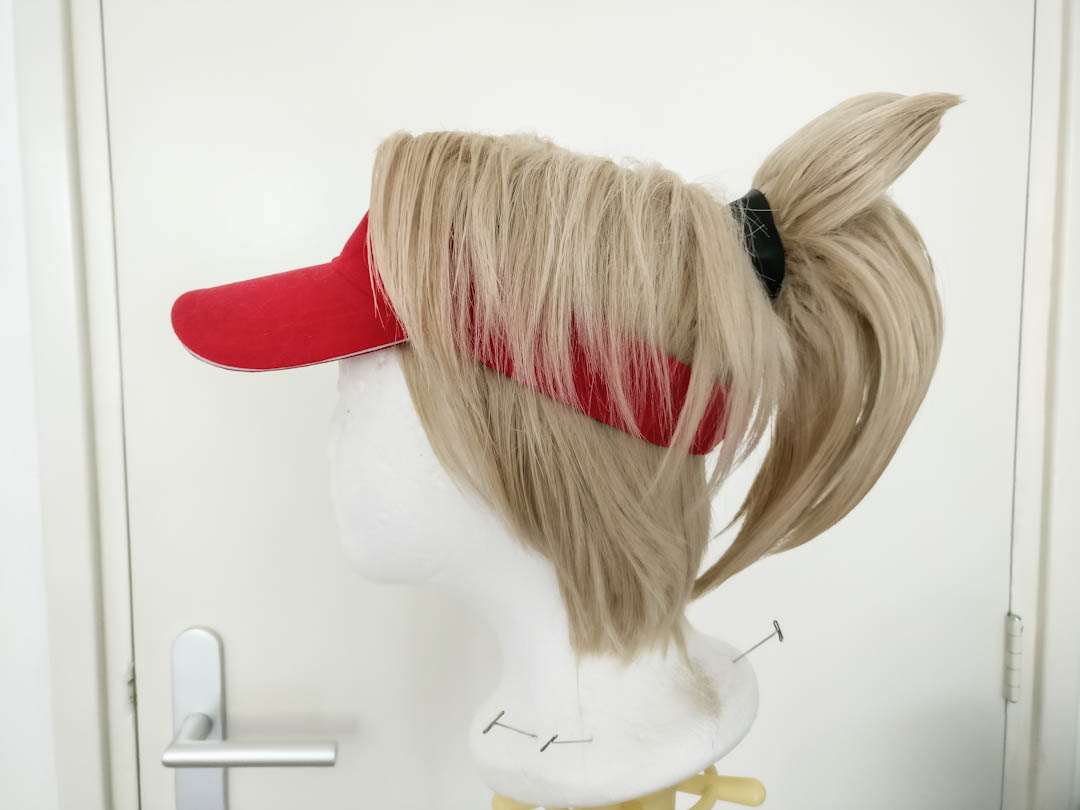
For the perfect finish wrap a band around the pony tail that matches your outfit.

One more thing!
Wear with pride, you just made a epic ponytail!

Final result

mercy wig 1
mercy wig 3
mercy wig 2

Photo: van Hoogstraten Fotografie, Edit: Linny l'a Vanté

Social Feed

When you're told to be outside more as a corset ma When you're told to be outside more as a corset maker.

I've been feeling a bit under the weather lately but I'm happy to get back working on the corset.
With the nice weather lately I've spend some days heat cutting synthetic lace, I'm still short of breath so by cutting the lace outside I don't have to wear a respirator. 
I can't wait to start laying the freshly cut applications on the green velvet corset, I'm going for a depth effect as " When light glimmer through the leaves of a thistle field".

#corsetmaking #appliqué #couture #lace
Planning out my first lace layer using this gorgeo Planning out my first lace layer using this gorgeous vintage lace that's been in my stock for over 15 years.

I'm trying out 2 lace lines, the left side has more lace volume than the right side. Pinning on 2 different shapes and leaving them on for a couple of days while looking at the design always helps me to make final choices. Which side is your favorite?
I know the lace design itself isn't symmetrical, my original sketch is asymmetric and thats why I finally had a purpose for this beautiful tri tone lace.

#couture #corsetcouture #corsetry #corsetmaker #lace
Mini fabric thistle test process, since I don't ow Mini fabric thistle test process, since I don't own a laser cutter myself I'm testing out my patterns with my plotter. You can see why using the plotter isn't optimal. (I have cut different types of fabric with different plotters and I'm not looking for advise)
I love doing little tests like this and learn more from my materials, getting a feeling on how the petals shape.

I just ordered multiple types of lace and beads to decorate the corset with and while I'm waiting for it's arrival I hope to prepare the files for the laser.

#thistle #couture #fabricflowers #handcrafted
I wasn't sure if I should upload this at first, bu I wasn't sure if I should upload this at first, but this was my honest first reaction from both fittings.
Same velvet corset at a different stage of construction.

I really love how a bespoke corset can shape the body.
Before I fit it again I will work on the lace layers and mini thistles as decoration, I just ordered some extra lace and already did the first tests on the mini thistles.
I hope you're as exited as I am to see this velvet beauty come to life.

#velvet #corset #fitting #couture #handcrafted
Second test fitting of the velvet corset ,I did al Second test fitting of the velvet corset ,I did all the adjustments I wanted and the corset now has it's final shape.

For this test fitting I inserted the minimal amount of boning just to check it's shape. Personally I think there is a huge difference between the first and second test fitting, the shape is better and the corset has an opening at the back now. 

What did I do? I replaced the 6 back panels and did miner shape alterations at the breasts and waistline, this could be as small as a 1mm difference but the results are visible. 

If you like to follow the process of this costume make sure to follow  my page.

#corset #fashion #costumedesigner #fitting #handcrafted
Instelling the eyelets in the velvet corset, this Instelling the eyelets in the velvet corset, this might look a little different than you would expect.

Aside from being in a tight corner my table also slides, to counter this I found a way that works for my hypermobile body. I still hope to expand my workshop in the future and have a table bolted to the wall for this job, but for now this will have to do.

#corsetmaking #velvetfashion #handcrafted #couture #fantasydress

Stay up to date

LV_Submark_White
Menu
  • Home
  • Portfolio
  • About
    • Biography
      • History
    • Awards / Activities
    • Booking
  • Blog
  • Shop

© 2026 By Linny l'a Vanté , All Rights Reserved

© 2026 By Linny l'a Vanté , All Rights Reserved

  • Refund and Returns Policy
  • Terms and Conditions
  • Privacy Policy
paypal
✕

Login

Lost your password?

Create an account?

  • Cookies
  • Details
  • About Cookies

We are baking some cookies to improve your experience. By using this website you agree to our Privacy Policy.

Necessary

Necessary cookies help make a website usable by enabling basic functions like page navigation and access to secure areas of the website. The website cannot function properly without these cookies.

Analytics & Performance

Statistic cookies help website owners to understand how visitors interact with websites by collecting and reporting information anonymously.

Marketing

Marketing cookies are used to track visitors across websites. The intention is to display ads that are relevant and engaging for the individual user and thereby more valuable for publishers and third party advertisers.

Cookies are small text files that can be used by websites to make a user's experience more efficient.

The law states that we can store cookies on your device if they are strictly necessary for the operation of this site. For all other types of cookies we need your permission. This means that cookies which are categorized as necessary, are processed based on GDPR Art. 6 (1) (f). All other cookies, meaning those from the categories preferences and marketing, are processed based on GDPR Art. 6 (1) (a) GDPR.

This site uses different types of cookies. Some cookies are placed by third party services that appear on our pages.

You can at any time change or withdraw your consent from the Cookie Declaration on our website.

Learn more about who we are, how you can contact us and how we process personal data in our Privacy Policy.

Please state your consent ID and date when you contact us regarding your consent.

Deny Customize Allow selected Allow all